

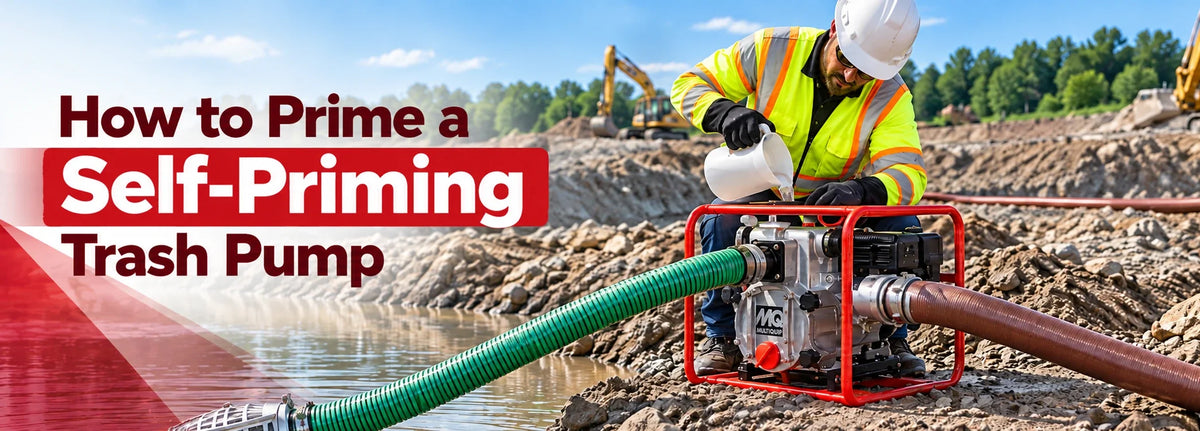
A wet self-priming trash pump can clear air from its suction hose, but it cannot start with an empty casing. Fill the casing through its designated port first. That water lets the impeller begin the priming cycle and helps protect the mechanical seal. Once air is cleared, the pump can draw water up from a source below it.
To get steady flow, the casing needs enough water, the suction hose must be airtight, and the strainer must stay submerged. Check your model's fill level and suction-lift limit before starting.
What Does Self-Priming Mean on a Trash Pump?
Self-priming means the pump can remove air from its suction hose after its casing has been filled. That lets you position the pump above the water source. It does not mean you can start it dry.
If you drained the pump after the last job, opened the cleanout, or left it in storage, do not assume there is still enough water inside. Check the casing before the next start.
This procedure is for a wet-primed centrifugal pump. Diaphragm pumps, vacuum-assisted dry-prime systems, and submersible pumps have different startup requirements.
How Does a Self-Priming Trash Pump Work?
Follow the water and air through the pump:
Stage 1: Fill the casing. The impeller needs the stored water to begin circulating. On most portable units, you fill the casing rather than the entire suction hose. Follow the model's fill level.
Stage 2: Clear the air. The impeller mixes air from the suction line with the circulating water. Inside the casing, air separates and leaves through the intended discharge or vent path. Water returns to the impeller and picks up more air.
Stage 3: Draw water up the hose. As air leaves, pressure in the suction line falls. Atmospheric pressure on the source water pushes it toward the pump. Even a small leak at a coupling can admit enough air to interrupt this process.
Stage 4: Establish flow. Once source water reaches the impeller, the discharge becomes steady. Some designs retain water after shutdown and can repeat the cycle on the next start, provided enough water remains in the casing.
Pump placement still matters. The height above the water, suction-hose friction, restrictions, altitude, and water temperature all reduce the margin available for priming.
How to Prime a Self-Priming Trash Pump
Use these steps for a portable wet-primed centrifugal unit. Follow the exact pump manual wherever its instructions differ.

Step 1. Check the model and the pumping job
Check the allowed liquid, solids passage, suction-lift limit, fill point, and engine setup before connecting hoses. A trash pump can pass only the material its model is rated to handle. Make sure the intake can remain submerged as the water level falls.
Step 2. Position the pump close to the source
Set the pump on firm, level ground near the water. Keep the lift and suction run as short and direct as practical. A lower position gives the water less height to climb. Keep the unit out of floodwater, and run a combustion engine outdoors with adequate ventilation.
Step 3. Seal the suction connections
Use reinforced suction hose in the inlet diameter specified for the pump. Check for cuts, holes, kinks, and soft spots that could collapse. Seat every gasket or O-ring and tighten the couplings. A joint can draw air without dripping water, so do not judge the seal by how dry it looks.
Step 4. Place the strainer correctly
Attach the specified strainer and keep it fully underwater, clear of the pit floor. As the source falls, the strainer must still have enough water over it to avoid drawing air. A strainer buried in silt can clog or pull heavy debris toward the pump.
Step 5. Set up the discharge
Secure the discharge hose, remove kinks, and route the water to a safe place. Air must be able to leave through the arrangement the pump was designed to use. A fixed system with a discharge check valve may need a designed air-release or bypass path; consult its installation manual.
Step 6. Fill the casing while the pump is stopped
Open the fill port only when the pump is stopped and cool. Add clean water to the casing to the specified level, then tighten the cap. If you drained the pump for winter or service, fill it again. Never loosen a fill cap on a hot or pressurized casing.
Step 7. Start and watch for continuous flow
Start the engine or drive using its normal controls, then watch the discharge. Air or short bursts of water may come out first. Keep the strainer submerged while you wait for a continuous stream. A smoothly running engine alone does not prove the pump has primed.
Step 8. Stop and inspect if flow does not establish
Give the pump only the priming time allowed in its manual. If no steady flow appears, stop it. Once the casing is safe to open, recheck the water charge, strainer, suction joints, hose, and pump height. Do not keep an unprimed pump running while you troubleshoot.
Consider a pump beside a rain-filled excavation. Its casing is full, but the discharge only spits water. The strainer may be sitting in silt, or air may be entering at a suction coupling. Raise and submerge the strainer, check the seals, and straighten or shorten the hose where possible. A 20-foot hose is not a 20-foot vertical lift, though its length and bends still add friction. Check the casing charge before another start.
How Do You Know the Pump Has Primed?
A primed pump sends out a continuous stream, not just a few spurts. A discharge gauge or a change in sound may offer another clue on some models, but the outlet is the simplest field check. If flow never becomes steady, the pump has not established a prime. If flow starts normally and then fades, look for a falling source level, new air leak, or restriction.
Why Is My Self-Priming Trash Pump Not Priming?
When no water arrives, check the visible setup first. Stop the pump and let it cool before removing the fill cap or cleanout.
| Symptom or likely cause | First check | Action |
|---|---|---|
| No water in the casing | Fill level at the designated port | Fill to the manual's level and secure the cap. |
| Air entering the suction line | Couplings, gaskets, priming cap, and hose | Reseat seals, tighten connections, or replace a damaged hose. |
| Intake exposed or blocked | Strainer depth, sediment, and debris | Submerge and raise the strainer off the bottom; clean it. |
| Suction hose collapses or traps air | Reinforcement, sharp bends, and high spots | Use suction-rated hose and a shorter, more direct route. |
| Too much suction lift or line loss | Water level, pump height, hose length | Lower or move the pump within its published operating limits. |
| Air cannot leave as designed | Discharge path and any installed check valve | Correct the arrangement using the model's installation instructions. |
| Setup checks pass but flow still fails | Flap/check valve, impeller, seal, and speed | Follow the manual's service checks or have the pump inspected. |
A suction coupling can leak without leaving a puddle. While the pump runs, the line pulls air inward. Inspect its seals and connections with the pump stopped; do not loosen a joint to test it while running.
It primed, then lost flow
If the pump delivered water before flow fell off, start at the source. Has the strainer become exposed, started pulling air through a vortex, or clogged with debris? Then check for a collapsing hose or a loosened coupling. Stop the pump before the casing overheats, and follow the manual if the external checks do not resolve it.
Do You Need to Fill the Casing Every Time?
Only if the casing has lost its required water charge. Some designs retain enough water after shutdown to clear the suction line again. Draining for winter, opening the cleanout, a leak, or long storage may leave too little. Check the fill level before restarting in those situations.
A compatible foot valve can hold water in the suction hose and make a restart quicker. It is not required on every pump. Some models have an internal flap or check valve, and an added foot valve may clog or restrict flow. Use the suction arrangement specified for your model.
What Limits Matter While Priming?
Suction lift is height, not hose length. Lift is measured from the source water surface to the pump inlet. A hose running mostly across the ground adds friction without adding the same amount of vertical lift. As the water level drops, the lift increases. If you need to check the full operating point, Cleanflow's guide to calculating pump size and total dynamic head explains the performance curve and discharge-side losses.
Port diameter is not solid capacity. The Multiquip QP2TH has 2-inch suction and discharge ports, but its maximum solids rating is 1 inch. Check the actual passage and use the strainer specified for the model; hose diameter alone does not tell you what can pass through the pump.
Self-priming is not dry-running. A suitable pump may clear the suction line again while water remains in its casing. It should not be left running without flow. Likewise, a trash rating does not make it a slurry pump. Check the fluid, solids, temperature, and seal limits.
Examples of Wet Self-Priming Trash Pumps
Pump size changes the job a model can handle, but not the need for water in its casing. These three pumps follow the wet-priming process described above.
- Multiquip QP2TH (2-inch): A portable gas trash pump for smaller drainage and dewatering jobs.

- Multiquip QP3TH (3-inch): A mid-size gas trash pump for excavation and utility work.

- Multiquip QP4TH (4-inch): A higher-flow gas trash pump for larger construction sites and high-volume dewatering.

Follow the manual for your model's fill level, suction setup, and allowable priming time.
Frequently Asked Questions
Can I start a self-priming trash pump with an empty casing?
No, not a wet self-priming centrifugal model. Fill its casing to the specified level first. A separately assisted dry-prime system may have different instructions.
Do I have to fill the entire suction hose?
Usually the casing is the required fill point, and the pump clears air from the suction hose. Follow your model's manual if it calls for a different arrangement.
How long should priming take?
Follow the priming period stated for your pump and installation. If steady flow does not appear by its stop/check point, shut down and inspect the setup.
Why does the pump lose prime after it starts?
Start with the water level and strainer. An exposed or clogged intake, surface vortex, suction leak, or collapsed hose can interrupt flow after a successful start.
Does a self-priming trash pump need a foot valve?
Not every model does. A compatible foot valve can help retain liquid in the suction hose, while other pumps have an internal check valve. Use the configuration recommended for your pump.
Can it pump mud?
A rated trash pump can handle pumpable muddy water within its solids and fluid limits. Thick or highly abrasive slurry can clog or wear a pump that was not built for that duty.
Before the next start
Before starting, confirm there is water in the casing, the strainer is submerged, and the suction joints are sealed. A continuous discharge confirms prime. If it never arrives, stop at the manual's check point and find the cause before trying again.
Need a pump for a new job? Cleanflow's guide to choosing a gas or diesel trash pump helps match the drive to the duty. You can then compare gas engine trash pumps or browse the full trash pump collection.